Jan 16, 2026
4 ways to use video as a design element
Learn how to integrate video into the backdrop or hero of your site for a more professional, dynamic design.
Educational

Every website has a hero image. But these days, only the most cutting-edge, eye-catching sites have a hero video.
Integrating video into the backdrop or hero of your site elevates the aesthetic to one of dynamism, movement, and energy.
In a recent video tutorial, Bolt power-user and designer Jakub Skrzypczak demonstrated how to create four captivating video-driven effects:
Inverted headline over video (text flips the colors behind it)
3D tilted “window card” reveal (video peeks through a masked opening)
Knockout text through a white overlay + blur (video shows through letters)
Video + shader combos (change the vibe instantly)
If you don’t have time to watch the video, we’re summarizing the key points below.
Check out Jakub’s demo environment: https://video-effects.bolt.host/
Experiment with the effects yourself: https://bolt.new/~/sb1-ief5nf8c
Choosing a video
Of course, integrating video into the design of your site requires that you first choose a video.
For that, you have two options:
Option A: Use placeholder videos (fastest)
Tell Bolt to use any royalty-free placeholder loop as you test design ideas. You can replace it with the video you really want later, when it’s time to launch your site.
Option B: Upload your own videos (more control)
In Bolt:
Open Code
Create a folder called
public/Add your videos (ex:
hero.mp4,forest.mp4,waves.mp4)Reference them in your components as
/hero.mp4etc.
For best results:
Keep it short (5–12s loops work best)
Export MP4 (H.264), muted
Stick with subtle motion (for readability)
Step 1: Build the base page
For the purposes of this tutorial, the first step is to create a base page you can experiment with.
Prompt (copy/paste this):
Create a single-page “Video Effects Playground” landing page in React + Tailwind.
 Use a full-bleed background video in the hero section (muted, loop, autoplay, playsInline).
 Add a simple settings panel (top-right) with toggles for:
Headline style: Normal / Inverted / Framed / KnockoutCard style: Simple Tilt / Masked RevealBlur behind knockout text: On/OffShader overlay: Off / Mesh / Dither / Dot Grid.
Use shadcn UI components for the settings panel. Keep the design minimal and premium
You’ll see:
A hero section with a background video layer
Text + CTA on top
A small “controls” panel that updates state
This virtual playground provides all the tools you need to explore the effects that spark joy.
Step 2: Effect #1: Inverted headline over video (lens/inversion look)
For this effect, the headline acts like a lens, flipping light and dark values behind it.
Prompt:
Add bit text over a video that changes color based on what’s behind it:
a big headline over the video that changes color based on what’s behind it:
light parts become dark and dark parts become light.
How to tell if it’s working:
The headline “reacts” to the video
As the video changes, the text contrast shifts dynamically
Add a “framed” variant (for a cinematic look)

If you want to make the effect feel larger-than-life, Jakub demos a a framed headline variant that turns the website hero into a poster/cinema screen.
Prompt:
Add a “Framed” headline style option: keep the same inverted/lens effect, but place the headline inside a subtle container frame (rounded corners, thin border, slight backdrop blur). Make it feel cinematic.
After adding the framed variant, you can further experiment by changing the font, color, height, size, and spacing of the headline to see how it affects the vibe.
Step 3: Effect #2: 3D tilted card reveal (masked window)
There are two ways to create the tilted card effect.
A. Simple tilt card (easy baseline)
A floating card that tilts on hover/mouse move. The video is visible inside a rectangle.
Prompt
Add a floating card component that tilts and rotates based on my mouse position when I hover it.
The card should display a cropped portion of the background video inside it.
This gives you the cool tilt effect but not the real ‘glimpse’ effect, because no matter how you tilt the card, you’ll still see the same amount of the video.
B. Masked reveal card (the real effect)

This effect takes more precise prompting, but it creates an effect where, as you tilt the card, you reveal different parts of the video.
Prompt
Update the card so the video only shows through a masked opening that changes with the card’s tilt.
 As the card rotates, the visible video area should feel like it’s peeking through an angled window (not just a static crop).
 Use masking/clip-path so the opening follows the card perspective.
If it works, you’ll see:
Not just a rectangle crop
The visible window of the video shape shifts as the card tilts
If Bolt gets close but not perfect, use this follow-up prompt:
The current card is tilting, but the video window is still a static rectangle.
 Make the visible video region deform with the card tilt so it looks like an angled cut-out opening.
Step 4: Effect #3: Knockout text through a white overlay + blur
This effect creates a big white overlay slab, with letters cut out so the video shows through the text. We’ll also blur the video only behind the text cutout to increase readability.
Prompt: knockout overlay
Add a huge white overlay rectangle near the top of the hero.
 Place a large headline on top where the letters are “cut out” of the white overlay, revealing the video behind the text.
 This should activate when “Headline style = Knockout.”
Prompt: blur behind the cutout text
Add an option “Blur behind knockout text.”
 When enabled, blur the video only in the area visible through the cutout letters, while the rest of the video remains sharp.
Here’s how to tell it worked:
White slab feels crisp and editorial
Text acts like a hole
Blur applies only inside the letter shapes
If blur ends up blurring everything, follow up with:
The blur should only apply to the video visible through the cutout text, not the entire background.
 Keep the rest of the hero video sharp.
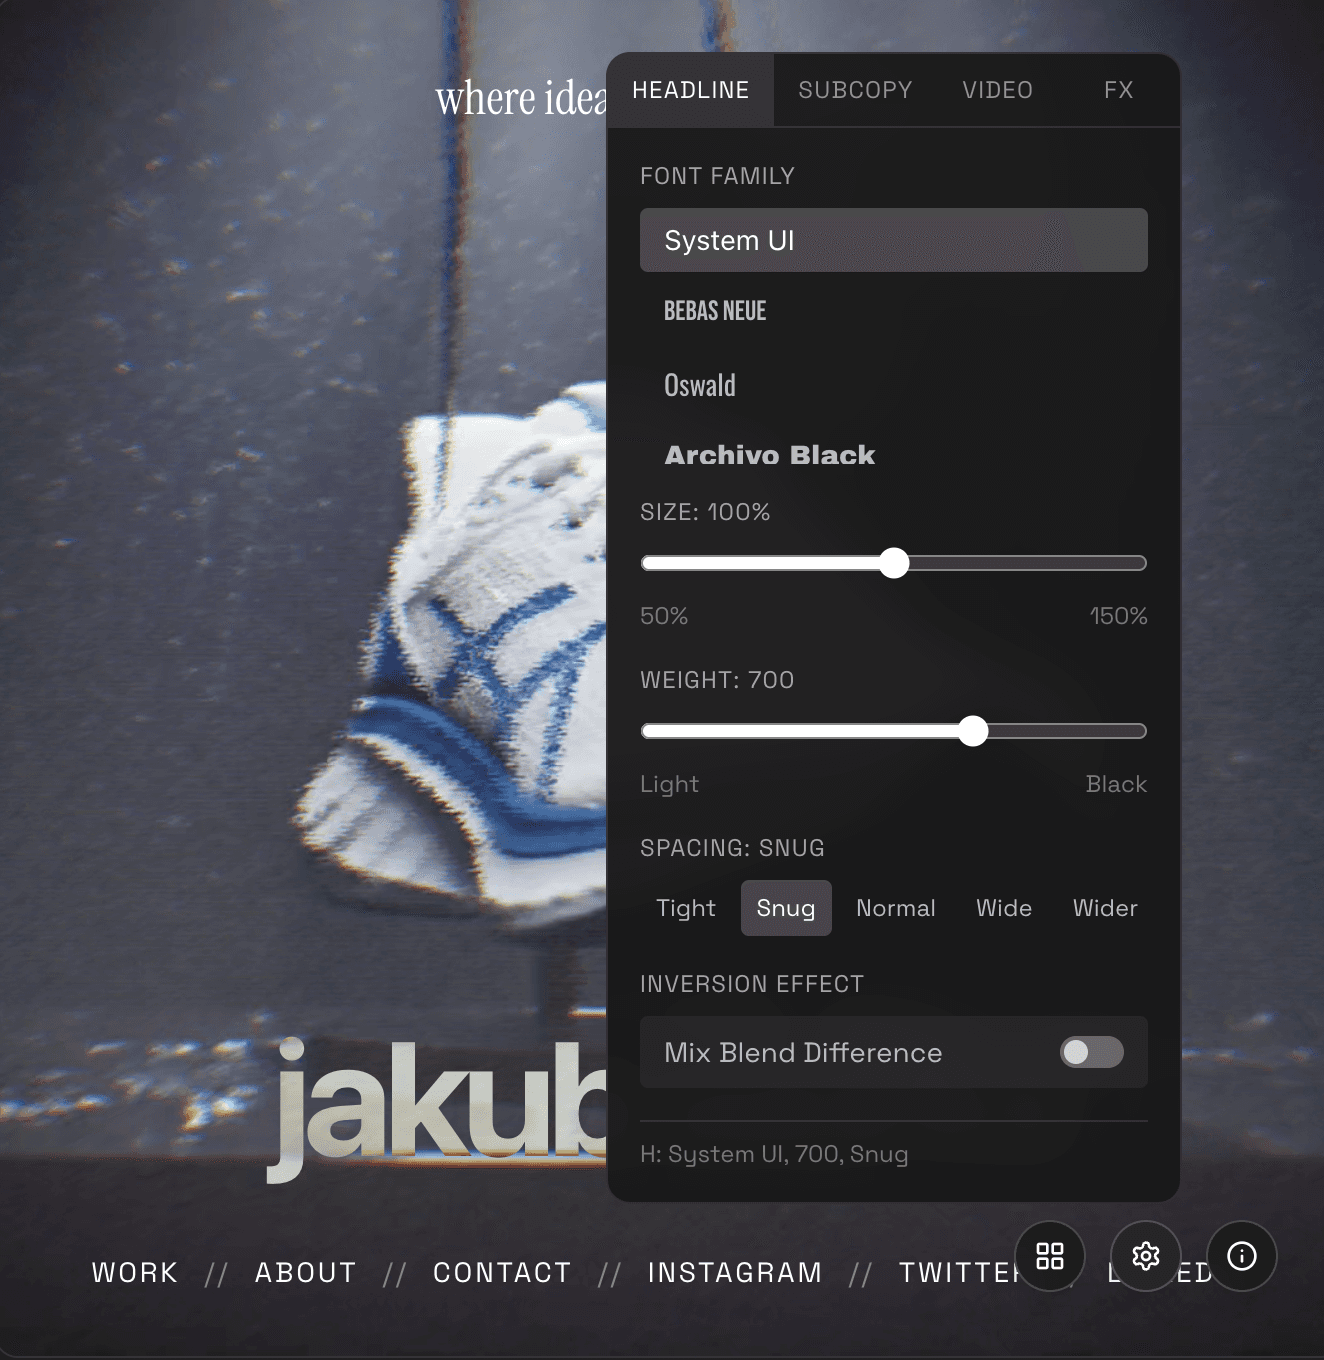
Step 5: Make it feel different instantly: font + weight controls
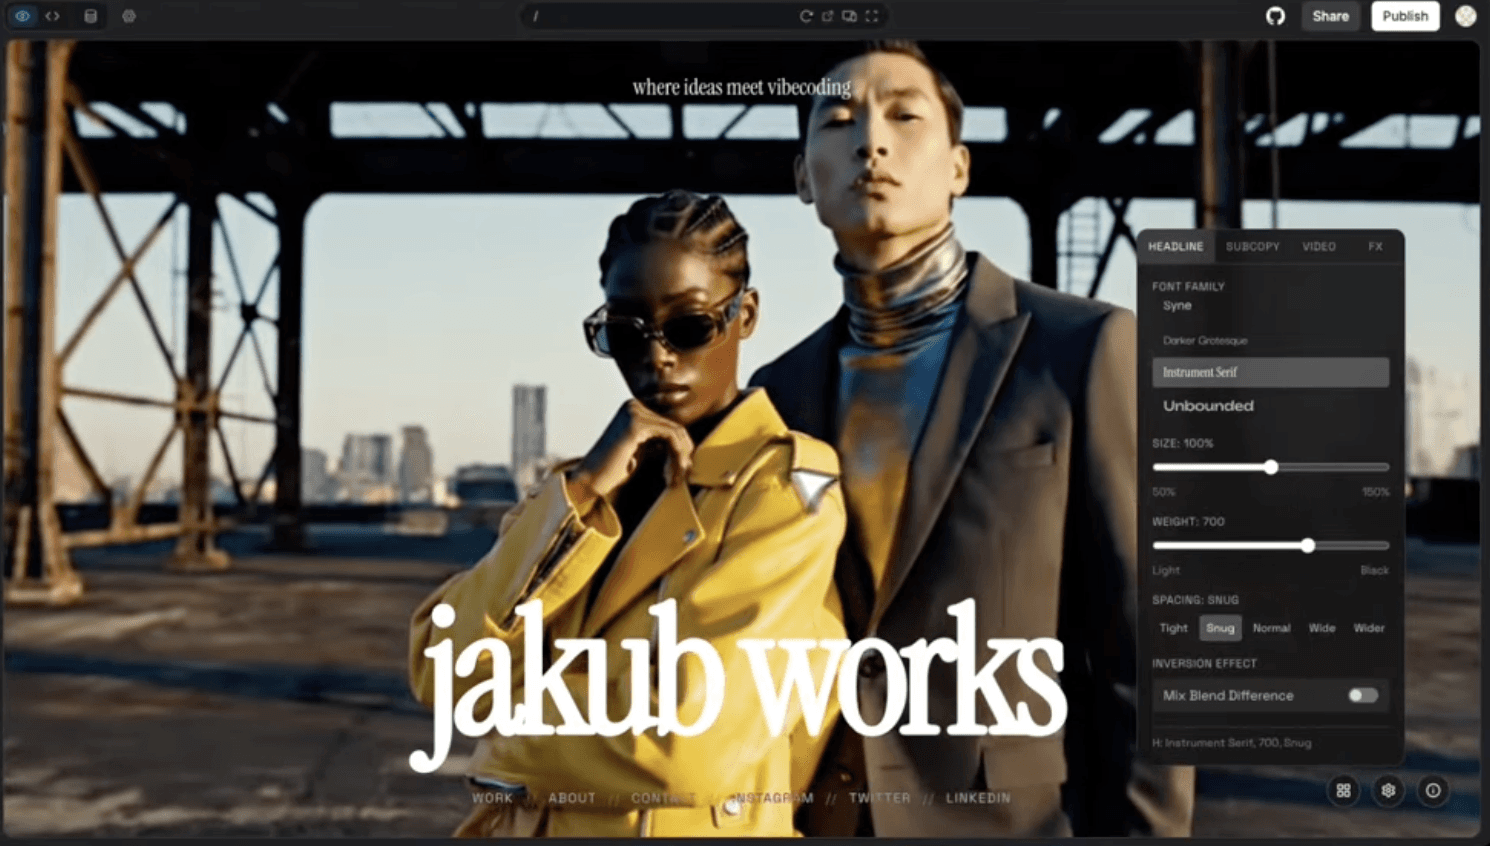
One of the simplest and most effective ways to completely shift the vibe of your site is to change the font. Explore several options until you land on the one that feels right.
Prompt
Add quick typography controls to the settings panel:
Font preset dropdown with 6–8 distinct headline font vibes (sans, serif, grotesk, editorial, etc.)Weight slider (or dropdown)Letter spacing control
Apply changes to the hero headline only.
You don’t need perfect font sourcing here. Just build the structure so swapping out fonts is easy.
Step 6: Add shaders (Paper.design) and blend them with video
Take things a step further by adding subtle shaders on top of the video background.
Prompt (shader system)
Add optional shader overlays that can layer on top of the video background:
Mesh gradient overlayDithering overlayDot grid overlay
Each shader should be subtle and adjustable (opacity slider).
The shader should never reduce text readability.
How to actually pull shaders in
If you’re using paper.design shaders:
Go to paper.design
Choose a shader
Right click → copy code (Tailwind/React)
Paste into Bolt and say:
Import this shader code and use it as the hero overlay background. Add it as a toggle option called “Shader: ___”.
Step 7: Create a “safe” version: white copy over editorial video

Sometimes inversion is too intense and knockout is too stylized. Here’s a clean version that keeps things simple: white copy over video, minimal overlays.
It helps to have a clean “Moto-style” version: white copy over video, minimal overlays.
Prompt
Add a “White Copy” mode:
 headline is clean white text over the video with subtle shadow/backdrop for readability.
 Keep it editorial, minimal, and premium.
If the other effects feel too busy or heavy, you can fall back on this safer option.
How to mix effects without ruining readability
There are infinite ways to mix and match effects, but it’s important that you don’t get carried away. Ultimately, your site still needs to be readable and useful.
Here are a couple rules of thumb for preventing your effects from getting overwhelming:
Inversion + heavy shader + busy video = often too much
Knockout + blur + subtle video = almost always premium
Tilt card + minimal overlay = safe and impressive
Always test contrast: if it’s hard to read, dial effects down
Prompt:
Make sure all headline styles remain readable over the video.
 If contrast drops, automatically increase text treatment (shadow, subtle backdrop blur, or overlay gradient) to maintain clarity.
Troubleshooting (common issues)
The above prompts should work fine, but if you do hit a snag, here are some fixes for the most common issues.
Video doesn’t autoplay
Ask Bolt to ensure:
mutedplaysInlineautoPlayloop
Prompt:
Ensure the background video plays on load on mobile: muted, playsInline, autoPlay, loop, and no controls.
Your cutout text isn’t cutting out (it’s just white text)
Prompt:
The text should be a true cutout (transparent letters) through the white overlay so the video shows through the letter shapes.
Blur applies to everything
Prompt:
Blur only the video visible through the cutout text—everything else stays sharp.
Masked card still looks like a normal crop
Prompt:
The visible region of the video must deform with tilt, like an angled window. Not a static rectangular crop.
The 4 copy/paste prompts (quick reference)
In summary:
Inverted headline: Add a big headline over the video that changes color based on what's behind it. Light becomes dark and dark becomes light.
Masked reveal card: Make the video peek through a masked opening that shifts with the card’s tilt, like an angled cutout window.
Knockout + blur: Create a white overlay slab with text cut out revealing video behind the letters, and optionally blur only the video inside the letters.
Shader overlays: Add subtle shader overlays (mesh/dither/dot grid) with opacity control, layered over video without hurting readability.
Ready to try these effects yourself? Build it with Bolt.


